
How to Configure MikroTik Router in Kenya
Learn how to configure a MikroTik router in Kenya for home, business and ISP networks, including WAN, LAN, DHCP, NAT, firewall, PPPoE, hotspot and bandwidth set
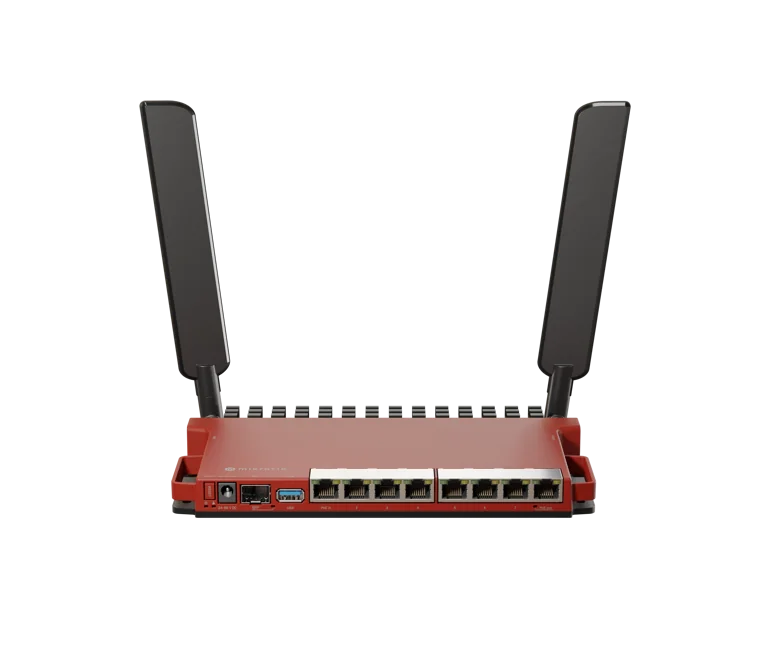
How to Configure MikroTik Router in Kenya
MikroTik Router Setup Guide for Home, Business and ISP Networks
How to Configure MikroTik Router in Kenya | Setup Guide
If you are running or planning to start an ISP in Kenya, one of the most important things to get right is your router configuration. Before getting into the technical setup, it is worth mentioning Tajira, an ISP billing system designed to help Kenyan internet service providers manage subscribers, packages, billing and customer accounts.
For ISPs using MikroTik routers, a billing platform such as Tajira can complement the network by helping organize the commercial side of the business while MikroTik handles routing, bandwidth management, PPPoE, hotspot services, VLANs, firewall rules and other network functions.
Once your billing and customer-management process is organized, the next step is configuring your MikroTik router correctly.
This guide explains how to configure a MikroTik router in Kenya for home, office, business, CCTV, hotspot and ISP environments.
What You Need Before Configuring a MikroTik Router
Before starting the setup, make sure you have:
a MikroTik router
a laptop or desktop computer
Ethernet cable
internet connection from your ISP
ISP username and password if required
MikroTik WinBox or browser access
network details provided by your ISP
administrator access to the router
You can explore available MikroTik products in Kenya if you have not yet selected a router.
Different models are suitable for different networks, so the router you choose should match your bandwidth, user count and expected workload.
Step 1: Connect to Your MikroTik Router
Start by connecting your computer to one of the LAN ports on the MikroTik router using an Ethernet cable.
Avoid connecting your computer to the WAN port unless the particular model uses a different default configuration.
You can normally access a MikroTik router using:
WinBox
WebFig through a browser
SSH
terminal access
For most beginners, WinBox is the easiest option.
Download WinBox from the official MikroTik website and open it on your computer.
The router should appear under the Neighbors section if your computer is connected correctly.
Select the router and log in.
Many MikroTik devices may require you to create or change the administrator password during initial setup.
Step 2: Change the Administrator Password
One of the first things you should do is secure the router.
Avoid leaving the default administrator account unsecured.
Create a strong administrator password containing a combination of:
uppercase letters
lowercase letters
numbers
symbols
For business and ISP networks, it is also advisable to create separate administrative accounts rather than allowing multiple technicians to share one login.
Good access control reduces the risk of unauthorized changes to your MikroTik configuration.
Step 3: Identify the WAN and LAN Interfaces
The WAN interface connects the MikroTik router to the internet source.
The LAN interfaces connect your internal network devices.
For example:
ether1 may be used as WAN.
ether2–ether5 may be used as LAN.
However, this can vary between MikroTik models.
Before configuring anything, confirm the interface names under:
Interfaces
You can rename the interfaces to make management easier.
For example:
WAN
OFFICE-LAN
CCTV
WIFI
ISP-UPLINK
Clear interface names make troubleshooting much easier, especially on larger networks.
Step 4: Configure the Internet Connection
Your internet connection may use one of several methods.
Common examples include:
DHCP
static IP
PPPoE
fibre connection
LTE
Starlink
another upstream ISP router
DHCP Internet Connection
If your ISP automatically assigns an IP address, configure a DHCP Client on the WAN interface.
Go to:
IP → DHCP Client
Add a DHCP client to the WAN interface.
Once connected, the MikroTik router should receive:
IP address
gateway
DNS information
Static IP Connection
If the ISP provides a static IP address, you will need:
IP address
subnet
gateway
DNS servers
Go to:
IP → Addresses
Add the assigned IP address to the WAN interface.
Then configure the gateway under:
IP → Routes
PPPoE Internet Connection
Some ISPs use PPPoE authentication.
Go to:
PPP → Interfaces
Add a PPPoE Client.
Enter the username and password supplied by the upstream provider.
Make sure the PPPoE connection is attached to the correct WAN interface.
Step 5: Configure the LAN IP Address
Your internal network requires a private IP range.
A common configuration is:
192.168.88.1/24
The router may already have this address by default.
You can also use another private range such as:
192.168.10.1/24
or:
10.0.0.1/24
Go to:
IP → Addresses
Assign the LAN IP to the bridge or LAN interface.
For example:
192.168.10.1/24
This IP becomes the gateway for devices connected to your network.
Step 6: Create a LAN Bridge
If several Ethernet ports will belong to the same local network, it is usually easier to create a bridge.
Go to:
Bridge
Create a new bridge such as:
LAN-BRIDGE
Then add the required Ethernet interfaces under:
Bridge → Ports
For example:
ether2
ether3
ether4
ether5
This allows all the selected ports to operate as part of one LAN.
Step 7: Configure DHCP Server
Most home and office users want connected devices to receive IP addresses automatically.
To do this, configure a DHCP Server.
Go to:
IP → DHCP Server
Use DHCP Setup and select the LAN bridge.
You will normally configure:
network range
gateway
IP address pool
DNS servers
lease time
For example:
Network:
192.168.10.0/24
Gateway:
192.168.10.1
Address range:
192.168.10.10 – 192.168.10.254
Once configured, connected devices should automatically receive IP addresses.
Step 8: Configure DNS
Go to:
IP → DNS
You can use DNS servers provided by your ISP or public DNS services.
If clients will use the MikroTik router as their DNS resolver, enable:
Allow Remote Requests
Only enable this for trusted internal networks and ensure firewall rules prevent public abuse.
Step 9: Configure NAT
Most private LAN networks require NAT to access the internet through one public or upstream IP connection.
Go to:
IP → Firewall → NAT
Create a rule:
Chain:
srcnat
Out Interface:
WAN
Action:
masquerade
This allows devices on the internal LAN to access the internet through the WAN connection.
Step 10: Configure Basic Firewall Protection
Firewall configuration is one of the most important parts of MikroTik setup.
Do not leave your router unnecessarily exposed to the internet.
A basic firewall normally controls:
traffic to the router itself
traffic passing through the router
invalid connections
established connections
remote administrative access
Typical protections include:
accept established and related traffic
drop invalid connections
allow trusted LAN management
restrict WinBox access
restrict SSH access
block unauthorized WAN access
For ISP and business deployments, firewall rules should be planned carefully rather than copied blindly from random online guides.
Step 11: Configure Wi-Fi
If you are using a wireless MikroTik router such as the MikroTik L009UiGS-2HaxD-IN, configure the wireless network according to your requirements.
Set:
Wi-Fi name or SSID
security mode
password
frequency settings
country
channel width
Use WPA2 or WPA3 where supported.
Avoid weak wireless passwords.
For business networks, consider separating staff, guests and IoT devices using VLANs.
Step 12: Configure VLANs
VLANs are useful when you want to separate different types of network traffic.
For example:
Staff VLAN
Guest VLAN
CCTV VLAN
VoIP VLAN
Management VLAN
Businesses and ISPs often use VLANs to improve security and simplify network design.
MikroTik RouterOS provides extensive VLAN capabilities, but they should be configured carefully because incorrect bridge or VLAN filtering settings can disconnect users from the network.
Step 13: Configure Bandwidth Management
MikroTik routers are popular in Kenya partly because they provide flexible bandwidth-management tools.
Depending on your network, you can use:
Simple Queues
Queue Tree
PCQ
PPP profiles
bandwidth limits
For example, an ISP may create packages such as:
5 Mbps
10 Mbps
20 Mbps
50 Mbps
A billing platform such as Tajira can help manage subscribers and packages, while MikroTik handles network enforcement according to the ISP's configuration.
Step 14: Configure PPPoE for an ISP
PPPoE is widely used by ISPs to authenticate customers.
To configure PPPoE Server on MikroTik, you normally need:
address pool
PPP profile
PPPoE server interface
subscriber usernames
subscriber passwords
bandwidth profile
Go to:
PPP → Profiles
Create the required profiles.
Then configure:
PPP → PPPoE Servers
and create subscriber accounts under:
PPP → Secrets
For larger networks, consider using centralized authentication or RADIUS rather than manually managing every subscriber directly on the router.
This is where combining MikroTik infrastructure with an ISP billing system can become especially useful.
Step 15: Configure MikroTik Hotspot
MikroTik Hotspot can be used in environments such as:
apartment Wi-Fi
hotels
cafés
campuses
public Wi-Fi
shared internet services
Go to:
IP → Hotspot
Run the Hotspot Setup wizard.
You will need to select:
hotspot interface
local network
address pool
DNS
hotspot hostname
user details
For commercial hotspot deployments, integrate billing and user management carefully so that subscriber access corresponds correctly with payments and service plans.
Step 16: Configure Internet Failover
Businesses and ISPs in Kenya often use more than one internet connection.
For example:
Primary:
Fibre ISP
Backup:
Starlink or 4G/5G
MikroTik can be configured so that when the primary internet connection fails, traffic switches to the backup connection.
This is called failover.
Typical configurations may use:
route distance
recursive routing
Netwatch
scripts
routing tables
The correct failover method depends on how your network is designed.
Step 17: Configure Load Balancing
If you have multiple internet connections, MikroTik can also be configured for load balancing.
This allows network traffic to use more than one WAN connection.
Possible methods include:
PCC
ECMP
policy routing
Load balancing should be configured carefully because some applications and secure sessions may be affected by incorrect routing.
Step 18: Configure MikroTik for CCTV
MikroTik routers are useful in CCTV networks where cameras, NVRs and remote users need reliable connectivity.
A CCTV network may include:
CCTV VLAN
static IP addresses
VPN
firewall rules
remote monitoring
bandwidth prioritization
For professional installations, avoid exposing NVRs and cameras directly to the public internet when secure VPN access can be used instead.
Step 19: Configure Remote Access Securely
Technicians often need remote access to MikroTik routers.
Possible methods include:
VPN
SSH
WinBox
WireGuard
IPsec
Avoid exposing management services directly to the internet without appropriate security controls.
Restrict administrative access using:
firewall rules
source IP restrictions
VPN
strong passwords
Step 20: Back Up the MikroTik Configuration
Once the router is working correctly, create a backup.
Go to:
Files → Backup
You should also consider exporting the configuration using the terminal.
For example:
/export file=mikrotik-backup
Keep backups securely.
This is particularly important for ISPs and businesses because recreating complex routing, firewall and subscriber configurations from memory can be difficult.
Choosing the Right MikroTik Router
Good configuration cannot compensate for hardware that is too weak for the network.
Choose your MikroTik router according to:
bandwidth
users
queues
PPPoE sessions
firewall complexity
VPN use
number of interfaces
SFP requirements
future growth
You can browse available MikroTik products in Kenya before selecting a router.
MikroTik L009UiGS-RM
The MikroTik L009UiGS-RM is a rackmount-oriented router suitable for structured business and networking installations.
It can be considered where multiple Ethernet ports, SFP connectivity and professional rack installation are required.
MikroTik RB4011iGS+RM
The MikroTik RB4011iGS+RM provides significantly more performance for professional networks.
It is commonly considered for:
ISPs
businesses
schools
CCTV networks
hotels
professional networking projects
Customers can also compare additional MikroTik router prices in Kenya before deciding which model best fits their network.
MikroTik for ISPs in Kenya
MikroTik is particularly useful for ISPs because RouterOS can support many important network services.
These include:
PPPoE
VLANs
hotspot
bandwidth management
queues
routing
VPN
firewall
multiple WAN connections
ISPs can combine this networking functionality with Tajira to create a more organized billing and subscriber-management environment.
The billing system handles the business side while MikroTik handles the network side.
Common MikroTik Configuration Mistakes
Avoid these common problems.
Leaving the Router Unsecured
Always change default credentials and restrict management access.
Incorrect NAT Rules
Improper NAT configuration can prevent devices from accessing the internet or expose services unintentionally.
Wrong Bridge Configuration
Incorrect bridge ports can cause connectivity problems.
Poor Firewall Rules
Firewall rules should protect the router without accidentally blocking legitimate traffic.
No Configuration Backup
Always save a working backup before making major changes.
Choosing an Undersized Router
A router that works for 20 users may not be suitable for several hundred customers.
Where to Buy MikroTik Routers in Kenya
If you need MikroTik routers, switches, wireless equipment or networking accessories, visit MikroTik Kenya.
You can browse our MikroTik products in Kenya and compare different routers according to your network requirements.
Additional MikroTik equipment is also available through Orbitlink Solutions.
Frequently Asked Questions
How do I configure a MikroTik router in Kenya?
Connect to the router using WinBox or WebFig, configure the WAN connection, assign LAN addresses, configure DHCP, DNS, NAT and firewall rules, then add any required services such as Wi-Fi, VLANs or PPPoE.
Can MikroTik be used for an ISP in Kenya?
Yes. MikroTik routers are commonly used for ISP networks because RouterOS supports PPPoE, hotspot, bandwidth management, VLANs, firewall rules, routing and other network-management functions.
Can Tajira work with a MikroTik-based ISP?
Tajira is designed to help ISPs manage billing, subscribers and packages, making it relevant to providers using MikroTik networking equipment.
Which MikroTik router should I use for an ISP?
The correct router depends on subscriber numbers, bandwidth and configuration complexity. Smaller networks may use L009, RB4011 or RB5009-class devices, while larger deployments may require Cloud Core Routers.
Can MikroTik manage bandwidth?
Yes. MikroTik RouterOS provides multiple bandwidth-management tools including queues, PPP profiles and traffic-control mechanisms.
Can I configure MikroTik for hotspot billing?
Yes. MikroTik supports Hotspot services, and a suitable billing platform can be used alongside the network to help manage customers and subscription plans.
Where can I buy MikroTik routers in Kenya?
You can browse MikroTik Kenya or compare MikroTik router prices in Kenya.
Start Configuring Your MikroTik Network
Configuring a MikroTik router correctly gives you significantly more control over your network.
Whether you are managing a home connection, business network, CCTV installation, hotspot or ISP, RouterOS provides tools for routing, bandwidth control, firewall management, VLANs, PPPoE, VPNs and multiple internet connections.
For ISPs, combining correctly configured MikroTik hardware with Tajira can help create a more structured network and billing environment.
If you are still choosing equipment, explore MikroTik products in Kenya or review popular routers such as the MikroTik L009UiGS-2HaxD-IN, MikroTik L009UiGS-RM and MikroTik RB4011iGS+RM.