
MikroTik RB4011 PPPoE Configuration
Learn MikroTik RB4011 PPPoE configuration for ISPs, including profiles, IP pools, users, bandwidth limits, VLANs, RADIUS and subscriber management.
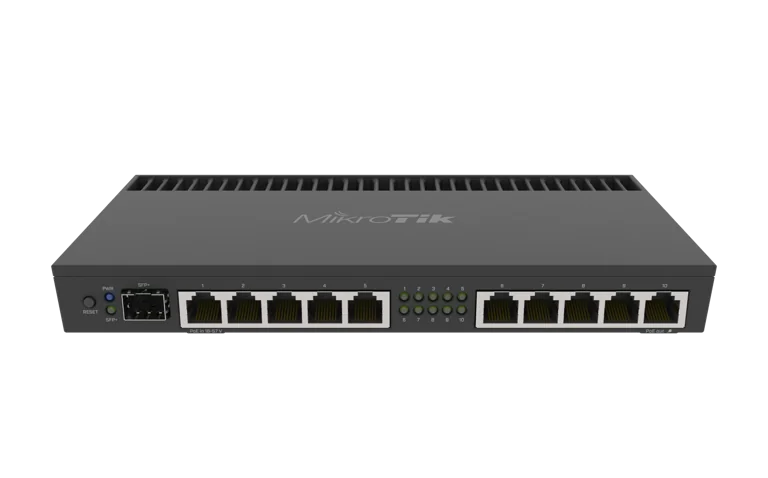
MikroTik RB4011 PPPoE Configuration
How to Configure PPPoE Server on MikroTik RB4011
MikroTik RB4011 PPPoE Configuration | ISP Setup Guide
The MikroTik RB4011iGS+RM is a strong router for PPPoE-based ISP networks because it combines good routing performance, ten Gigabit Ethernet ports, a 10G SFP+ interface and the flexibility of RouterOS.
PPPoE is widely used by ISPs to authenticate subscribers, assign IP addresses, control packages and manage customer sessions. On the RB4011, PPPoE can be configured for small and medium-sized deployments using RouterOS profiles, IP pools, PPP secrets and bandwidth limits.
You can view the MikroTik RB4011iGS+RM or browse more MikroTik products in Kenya.
What Is PPPoE?
PPPoE stands for Point-to-Point Protocol over Ethernet.
ISPs commonly use it to give each subscriber unique login credentials.
A typical PPPoE customer has:
username
password
internet package
IP assignment
bandwidth limit
account status
The MikroTik router authenticates the subscriber and applies the correct profile.
Why Use PPPoE on MikroTik RB4011?
PPPoE can help an ISP manage customers in a structured way.
Benefits include:
individual subscriber authentication
different speed packages
user tracking
dynamic IP assignment
easier account management
centralized subscriber policies
compatibility with RADIUS
The RB4011 is suitable for PPPoE because RouterOS provides native PPP server functionality.
Before Configuring PPPoE
Prepare the following:
RB4011 with RouterOS configured
WAN connection
customer-facing interface or VLAN
subscriber IP pool
DNS settings
speed packages
customer usernames and passwords
firewall rules
For larger deployments, also plan RADIUS or billing integration.
Step 1: Configure the WAN Connection
First make sure the RB4011 already has internet access.
Your WAN may use:
DHCP
static IP
upstream PPPoE
fibre connection
Confirm the router can reach the internet before adding subscribers.
Step 2: Choose the PPPoE Interface
Decide where customers will connect.
For example:
ether4
or a VLAN such as:
VLAN20-PPPOE
Using a dedicated interface or VLAN is generally cleaner than mixing customer PPPoE traffic with management traffic.
Step 3: Create an IP Pool
Go to:
IP → Pool
Create a pool for PPPoE customers.
Example:
Name:
PPPOE-POOL
Addresses:
10.10.10.2-10.10.10.254
This pool will be used to assign IP addresses to subscribers.
Step 4: Create a PPP Profile
Go to:
PPP → Profiles
Create a profile.
Example:
Name:
10Mbps
Local Address:
10.10.10.1
Remote Address:
PPPOE-POOL
DNS Server:
use your preferred DNS servers
Rate Limit:
10M/10M
This profile can then be assigned to subscribers on a 10 Mbps package.
Step 5: Create More Speed Profiles
Create additional profiles for each package.
For example:
5 Mbps
10 Mbps
20 Mbps
30 Mbps
50 Mbps
100 Mbps
Example rate limits:
5M/5M
10M/10M
20M/20M
50M/50M
Keep package names clear so technicians can manage customers easily.
Step 6: Enable PPPoE Server
Go to:
PPP → PPPoE Servers
Add a new server.
Configure:
Service Name:
ISP-PPPOE
Interface:
customer-facing interface or VLAN
Default Profile:
your default subscriber profile
Authentication:
enable appropriate methods according to your network policy
One Session Per Host:
use where appropriate
Then enable the PPPoE server.
Step 7: Create a PPPoE Subscriber
Go to:
PPP → Secrets
Add a new subscriber.
Example:
Name:
customer001
Password:
use a strong customer password
Service:
pppoe
Profile:
10Mbps
The subscriber can now connect using these credentials.
Step 8: Test the PPPoE Connection
Connect a customer router or computer to the subscriber network.
Create a PPPoE client using:
Username:
customer001
Password:
the assigned password
Confirm that the client receives:
IP address
DNS
internet access
correct speed package
Step 9: Configure NAT
If subscribers use private IP addresses, configure source NAT.
Go to:
IP → Firewall → NAT
Create:
Chain:
srcnat
Out Interface:
WAN
Action:
masquerade
For larger ISP networks with public addressing, the design may be different.
Step 10: Configure Firewall Rules
Protect both the router and customer network.
Important firewall goals include:
block unwanted access to the router
protect management services
drop invalid traffic
allow established and related traffic
restrict subscriber access to management subnets
Do not expose WinBox or SSH openly to customer networks unless intentionally required.
Step 11: Restrict Subscriber Access to Router Management
Create firewall rules so customers cannot access:
WinBox
WebFig
SSH
API
internal management systems
Use a dedicated management VLAN or trusted subnet for technicians.
Step 12: Use VLANs for PPPoE
For larger networks, PPPoE is often carried over VLANs.
Example:
VLAN 10 – Management
VLAN 20 – PPPoE subscribers
VLAN 30 – CCTV
VLAN 40 – Backbone
This makes the network cleaner and reduces accidental access between customer and management traffic.
Step 13: Configure RADIUS
For larger subscriber bases, avoid managing every user manually under PPP Secrets.
Use RADIUS for centralized authentication.
RouterOS can send PPPoE authentication requests to a RADIUS server.
This allows better integration with:
billing systems
subscriber databases
automated activation
account suspension
usage policies
Step 14: Use Tajira With PPPoE
ISPs using MikroTik can also use Tajira for billing and subscriber-management workflows.
A typical setup may be:
Tajira → billing, packages and customers
RB4011 → PPPoE, routing and bandwidth enforcement
For growing ISPs, this is easier to manage than maintaining customer information manually in several places.
Step 15: Configure Bandwidth Through PPP Profiles
PP profiles can control customer speeds.
Example:
5 Mbps package:
5M/5M
10 Mbps package:
10M/10M
20 Mbps package:
20M/20M
This allows each customer to inherit the appropriate speed automatically after authentication.
Step 16: Use PCQ Where Appropriate
PCQ can help distribute bandwidth more efficiently in some ISP environments.
It can be useful where:
many users share upstream bandwidth
package management is more complex
you want scalable queue handling
The correct queue design depends on your ISP topology.
Step 17: Monitor Active PPPoE Sessions
Go to:
PPP → Active Connections
You can see connected subscribers.
Useful information includes:
username
IP address
uptime
interface
session details
This helps technicians troubleshoot connection problems.
Step 18: Disconnect a Subscriber
A customer can be disconnected by removing the active session or disabling the user.
This may be useful for:
troubleshooting
account suspension
testing
package changes
In automated billing environments, suspension should ideally be controlled by the billing workflow.
Step 19: Configure Static IP for a PPPoE Customer
If a customer requires a fixed IP, assign a specific Remote Address in the subscriber's PPP secret or profile.
This can be useful for:
businesses
CCTV remote access
servers
special customer plans
Ensure the fixed IP does not conflict with the dynamic pool.
Step 20: Back Up the PPPoE Configuration
Once the system is working, create a backup.
Go to:
Files → Backup
Also export the configuration:
/export file=rb4011-pppoe
Keep backups securely.
Recommended PPPoE Layout for RB4011
A practical ISP layout could be:
Ether1 – WAN 1
Ether2 – WAN 2
Ether3 – Management
Ether4 – PPPoE Distribution
Ether5 – Wireless Backhaul
Ether6 – Access Points
Ether7 – CCTV
Ether8 – Server
Ether9 – Backup
Ether10 – PoE device
SFP+ – Core Switch
This is only an example. Your network may require a different topology.
Common PPPoE Problems
Customer Cannot Authenticate
Check:
username
password
PPP profile
PPPoE server interface
VLAN configuration
Customer Connects but Has No Internet
Check:
NAT
DNS
routes
firewall
WAN connectivity
Customer Gets Wrong Speed
Check the assigned PPP profile and rate limit.
PPPoE Sessions Drop Frequently
Investigate:
physical network quality
fibre or wireless link stability
CPU load
packet loss
MTU/MRU
upstream issues
Router CPU Is Too High
Review:
number of sessions
queues
firewall rules
traffic levels
packet sizes
If the router is consistently overloaded, consider upgrading.
RB4011 vs RB5009 for PPPoE
Both routers can handle PPPoE.
RB5009 offers:
newer ARM64 platform
2.5G Ethernet
USB 3.0
RB4011 offers:
ten Gigabit Ethernet ports
rackmount design
strong port density
For newer deployments, RB5009 may provide a better future upgrade path.
For port-heavy networks, RB4011 remains attractive.
RB4011 vs CCR for PPPoE
For larger ISPs, a CCR may be more appropriate.
Choose RB4011 when:
network is small or medium
bandwidth is moderate
subscriber count is manageable
Choose CCR when:
subscriber numbers are much higher
backbone traffic is large
more high-speed interfaces are required
CPU load is consistently high
MikroTik RB4011 Price in Kenya
If you are building a PPPoE network, check the current MikroTik RB4011iGS+RM price in Kenya.
You can also browse MikroTik products in Kenya.
For more options, compare MikroTik router prices in Kenya or browse MikroTik products.
Frequently Asked Questions
Can MikroTik RB4011 run PPPoE server?
Yes. RouterOS supports PPPoE server functionality.
How do I create PPPoE users on RB4011?
Go to PPP → Secrets and add the subscriber username, password and profile.
Can I set speed limits for PPPoE users?
Yes. Use the Rate Limit field in PPP profiles.
Can RB4011 work with RADIUS?
Yes. RouterOS supports RADIUS integration for PPP authentication.
Can Tajira work with MikroTik PPPoE?
Yes. Tajira can support billing and subscriber workflows while MikroTik handles PPPoE and network enforcement.
How many PPPoE users can RB4011 support?
There is no fixed universal number. Capacity depends on bandwidth, queues, firewall rules, packet size and overall RouterOS workload.
Can PPPoE customers use static IP addresses?
Yes. You can assign fixed remote addresses to selected subscribers.
Why does PPPoE connect but internet does not work?
Common causes include missing NAT, incorrect routes, DNS issues or firewall rules.
Is RB4011 good for apartment PPPoE?
Yes, for appropriately sized apartment internet deployments.
Where can I buy RB4011 in Kenya?
You can view the MikroTik RB4011iGS+RM on MikroTik Kenya.
Final Thoughts on MikroTik RB4011 PPPoE Configuration
The MikroTik RB4011iGS+RM is a strong router for PPPoE-based ISP networks when configured correctly.
A complete PPPoE setup normally includes:
WAN
subscriber VLAN or interface
IP pool
PPP profiles
PPPoE server
subscriber accounts
NAT
firewall
bandwidth management
monitoring
For smaller ISPs, users can be managed directly in RouterOS.
For growing networks, RADIUS and a billing platform such as Tajira can make subscriber management much easier.
If you are planning a new PPPoE deployment, check the current MikroTik RB4011iGS+RM price in Kenya before purchasing.