
MikroTik RB4011 VLAN Configuration
Learn MikroTik RB4011 VLAN configuration with tagged and untagged ports, PVID, trunk ports, DHCP, firewall rules and VLAN setup for ISP, CCTV and business netwo
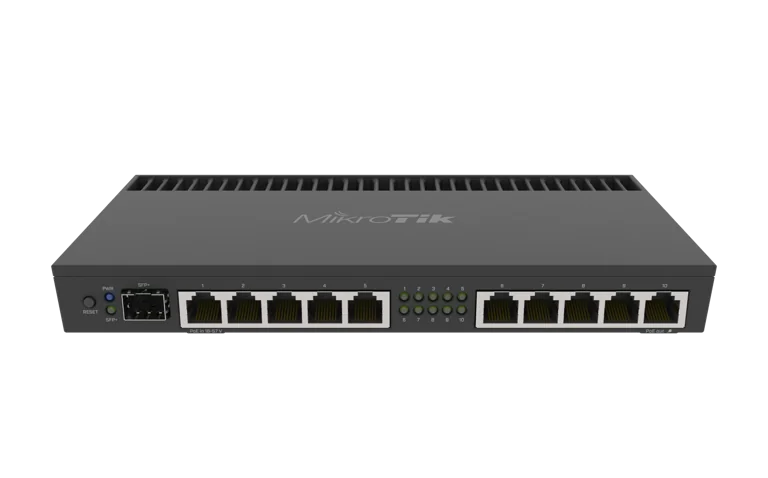
MikroTik RB4011 VLAN Configuration
How to Configure VLANs on MikroTik RB4011
MikroTik RB4011 VLAN Configuration | Step-by-Step Guide
The MikroTik RB4011iGS+RM is a powerful router for networks that require VLAN segmentation, advanced routing, firewall control and multiple departments or services on the same infrastructure.
For businesses, ISPs, CCTV installers, schools, hotels and offices in Kenya, VLANs can help separate staff, guests, CCTV, servers, management devices and subscriber traffic without needing a completely separate physical network for each service.
This guide explains how to configure VLANs on the RB4011 using RouterOS, including VLAN planning, bridge configuration, tagged and untagged ports, IP addressing, DHCP and firewall policies.
You can view the MikroTik RB4011iGS+RM or browse more MikroTik products in Kenya.
What Is a VLAN?
VLAN stands for Virtual Local Area Network.
A VLAN allows one physical network to be divided into multiple logical networks.
For example, a business can use:
VLAN 10 – Management
VLAN 20 – Staff
VLAN 30 – CCTV
VLAN 40 – Guest Wi-Fi
VLAN 50 – Servers
Even if these devices are connected through the same managed switch or MikroTik router, they can remain logically separated.
Why Use VLANs on the MikroTik RB4011?
The RB4011 is particularly suitable for VLAN networks because it provides:
10 Gigabit Ethernet ports
10G SFP+ uplink
RouterOS
advanced bridge VLAN filtering
firewall control
DHCP
routing
bandwidth management
VLANs are useful when you need to improve:
security
traffic organization
network management
scalability
troubleshooting
Example RB4011 VLAN Network
For this guide, we can use the following example:
VLANPurposeSubnetVLAN 10Management192.168.10.0/24VLAN 20Staff192.168.20.0/24VLAN 30CCTV192.168.30.0/24VLAN 40Guest192.168.40.0/24VLAN 50Servers192.168.50.0/24The RB4011 will route traffic between these VLANs according to firewall rules.
Step 1: Plan Your VLANs Before Configuration
Do not start configuring VLANs without a clear plan.
Decide:
VLAN IDs
subnet for each VLAN
which ports will be access ports
which ports will be trunk ports
which devices need communication between VLANs
which traffic should be blocked
This reduces the risk of creating a confusing or insecure setup.
Step 2: Back Up the Existing Configuration
Before changing bridge or VLAN settings, create a backup.
In WinBox:
Files → Backup
You can also create a text export:
/export file=rb4011-before-vlan
VLAN misconfiguration can lock you out of the router, so a backup is important.
Step 3: Create a Bridge
Go to:
Bridge
Create a bridge such as:
BRIDGE-LAN
Initially, keep VLAN filtering disabled while preparing the configuration.
This reduces the chance of losing access before all VLAN rules are ready.
Step 4: Add Ports to the Bridge
Go to:
Bridge → Ports
Add the interfaces that will participate in the VLAN network.
Example:
ether2
ether3
ether4
ether5
ether6
ether7
ether8
ether9
ether10
sfp-sfpplus1
Do not add the WAN interface unless your design specifically requires it.
Step 5: Decide Which Ports Are Tagged and Untagged
This is one of the most important VLAN concepts.
Tagged Port
A tagged port carries multiple VLANs.
It is commonly used between:
router and managed switch
router and access point
router and another VLAN-aware device
This is often called a trunk port.
Untagged Port
An untagged port belongs to one VLAN.
It is commonly used for:
desktop computer
CCTV recorder
ordinary printer
non-VLAN-aware device
This is often called an access port.
Example Port Layout
A practical layout could be:
ether2 – Staff access port
ether3 – CCTV access port
ether4 – Server access port
ether5 – Guest access port
ether6 – Management access port
ether10 – Trunk to managed switch
SFP+ – Trunk to core switch
Your configuration can differ depending on the network.
Step 6: Configure PVID on Access Ports
PVID stands for Port VLAN ID.
It determines which VLAN untagged incoming traffic belongs to.
Example:
Staff port:
PVID 20
CCTV port:
PVID 30
Guest port:
PVID 40
Management port:
PVID 10
Set these under:
Bridge → Ports
Step 7: Create Bridge VLAN Entries
Go to:
Bridge → VLANs
Create the VLAN membership rules.
For example:
VLAN 10
Tagged:
BRIDGE-LAN
ether10
sfp-sfpplus1
Untagged:
ether6
VLAN 20
Tagged:
BRIDGE-LAN
ether10
sfp-sfpplus1
Untagged:
ether2
VLAN 30
Tagged:
BRIDGE-LAN
ether10
sfp-sfpplus1
Untagged:
ether3
VLAN 40
Tagged:
BRIDGE-LAN
ether10
sfp-sfpplus1
Untagged:
ether5
VLAN 50
Tagged:
BRIDGE-LAN
ether10
sfp-sfpplus1
Untagged:
ether4
Step 8: Create VLAN Interfaces
Go to:
Interfaces → VLAN
Create VLAN interfaces on the bridge.
Example:
Name:
VLAN10-MGMT
VLAN ID:
10
Interface:
BRIDGE-LAN
Repeat for:
VLAN20-STAFF
VLAN30-CCTV
VLAN40-GUEST
VLAN50-SERVERS
These interfaces allow the RB4011 to route traffic for each VLAN.
Step 9: Assign IP Addresses
Go to:
IP → Addresses
Assign a gateway IP to each VLAN interface.
Example:
VLAN 10:
192.168.10.1/24
VLAN 20:
192.168.20.1/24
VLAN 30:
192.168.30.1/24
VLAN 40:
192.168.40.1/24
VLAN 50:
192.168.50.1/24
These addresses become the gateways for devices in each VLAN.
Step 10: Configure DHCP for Each VLAN
If devices should receive IP addresses automatically, create a DHCP server for each VLAN.
For example:
Staff VLAN
Network:
192.168.20.0/24
Gateway:
192.168.20.1
Pool:
192.168.20.20-192.168.20.254
CCTV VLAN
Network:
192.168.30.0/24
Gateway:
192.168.30.1
Pool:
192.168.30.20-192.168.30.254
Repeat for the other VLANs as needed.
Step 11: Enable Bridge VLAN Filtering
Only enable VLAN filtering after:
PVIDs are configured
bridge VLAN table is complete
management access is confirmed
trunk ports are correctly set
Then go to:
Bridge
Edit:
BRIDGE-LAN
Enable:
VLAN Filtering
Be careful at this stage.
An incorrect configuration may disconnect you from the router.
Step 12: Test Each VLAN
Connect a device to each access port.
Confirm that it receives the correct IP address.
For example:
Device on Staff port should receive:
192.168.20.x
Device on CCTV port should receive:
192.168.30.x
Device on Guest port should receive:
192.168.40.x
If a device receives an address from the wrong subnet, check:
PVID
tagged/untagged membership
DHCP interface
bridge configuration
Step 13: Configure Internet Access
If the RB4011 already uses a standard masquerade NAT rule through the WAN, VLAN clients can usually access the internet once routing and firewall rules allow it.
Typical NAT:
Chain:
srcnat
Out Interface:
WAN
Action:
masquerade
Step 14: Create Firewall Rules Between VLANs
Creating VLANs alone does not automatically mean the networks are completely isolated.
Because the RB4011 routes between VLAN interfaces, firewall policies should control communication.
For example:
Staff to Internet
Allow.
Staff to Servers
Allow selected services.
Guest to Staff
Block.
Guest to CCTV
Block.
CCTV to Staff
Block.
Management to All VLANs
Allow for administrators.
This is where VLAN security becomes truly effective.
Step 15: Isolate Guest Wi-Fi
Guest users normally need:
internet access
DNS
DHCP
They usually do not need access to:
staff computers
CCTV
servers
management interfaces
Create firewall rules that prevent VLAN 40 from reaching your private VLANs.
Step 16: Isolate CCTV Traffic
CCTV devices should usually be separated from normal staff networks.
You may allow:
NVR access
selected management computers
VPN-based remote access
while blocking unnecessary connections from cameras to other networks.
This can improve security significantly.
Step 17: Protect the Management VLAN
The management VLAN should contain trusted equipment such as:
MikroTik router
managed switches
access points
network controllers
Only authorized administrators should have access to this VLAN.
Do not place normal users or guests on the management network.
Step 18: Configure VLANs for Access Points
Many professional access points can carry multiple SSIDs over VLANs.
For example:
Staff Wi-Fi → VLAN 20
CCTV wireless devices → VLAN 30
Guest Wi-Fi → VLAN 40
The Ethernet port connecting the access point should be configured as a trunk port.
The access point then tags each SSID with the appropriate VLAN ID.
Step 19: Configure VLAN Trunk to a Managed Switch
If the RB4011 connects to a managed switch, configure the connection as a trunk.
For example:
RB4011 ether10:
Tagged VLANs:
10, 20, 30, 40, 50
The corresponding switch uplink should be configured with the same VLANs.
If the VLAN membership does not match on both sides, traffic may fail.
Step 20: Use SFP+ as a VLAN Trunk
The RB4011's 10G SFP+ interface is excellent for a core-switch trunk.
You can carry several VLANs across the 10G link, including:
management
staff
CCTV
guest
servers
ISP traffic
This can be useful for larger office and ISP networks.
RB4011 VLAN Configuration for ISPs
ISPs can use VLANs to separate:
management
PPPoE subscribers
infrastructure
wireless backhaul
CCTV
upstream traffic
Example:
VLAN 10 – Management
VLAN 100 – Subscribers
VLAN 200 – Backhaul
VLAN 300 – Infrastructure
This keeps the ISP network easier to manage and troubleshoot.
ISPs using MikroTik infrastructure can also use Tajira for billing and subscriber-management workflows.
RB4011 VLAN Configuration for CCTV
A CCTV installer can use:
VLAN 30 – Cameras
VLAN 31 – NVR
VLAN 10 – Management
Firewall rules can then allow only the required traffic between the NVR, cameras and authorized users.
This is safer than placing every device on one large flat network.
RB4011 VLAN Configuration for Hotels
Hotels can create separate VLANs for:
administration
staff
guests
CCTV
POS
servers
Guest users should be isolated from internal systems.
The RB4011 can route between these networks while enforcing firewall policies.
RB4011 VLAN Configuration for Schools
Schools can use VLANs for:
administration
teachers
students
computer labs
CCTV
servers
This makes it easier to apply different access and security rules for each group.
VLANs and Bandwidth Management
Each VLAN can also have different bandwidth policies.
For example:
Guest Wi-Fi:
Limited bandwidth
Staff:
Higher priority
CCTV:
Guaranteed internal capacity
Servers:
High priority
RouterOS queues can be combined with VLAN architecture for better traffic management.
Common MikroTik VLAN Mistakes
Enabling VLAN Filtering Too Early
Complete the VLAN configuration before enabling filtering.
Incorrect PVID
An incorrect PVID can place devices in the wrong VLAN.
Forgetting the Bridge as Tagged
When the router needs Layer 3 access to the VLAN, the bridge itself commonly needs to participate correctly in the tagged VLAN configuration.
Wrong Trunk Configuration
Both sides of a trunk must agree on VLAN membership.
No Firewall Isolation
VLANs separate broadcast domains, but router firewall rules are still needed to control routed communication between them.
Losing Management Access
Always keep a safe management path while making VLAN changes.
Troubleshooting VLAN Problems
If a VLAN does not work, check:
VLAN ID
PVID
bridge port membership
tagged and untagged entries
VLAN interface
IP address
DHCP server
firewall
managed switch configuration
access point VLAN settings
Test one layer at a time.
Should You Use VLANs on RB4011?
Yes, especially when your network contains different types of devices or users.
VLANs are strongly recommended for:
businesses
hotels
schools
CCTV
ISPs
guest Wi-Fi
multi-department offices
For a very small home network, VLANs may not be necessary.
MikroTik RB4011 Price in Kenya
If you are planning a professional VLAN deployment, check the current MikroTik RB4011iGS+RM price in Kenya.
You can also browse MikroTik products in Kenya.
For additional options, compare MikroTik router prices in Kenya or browse MikroTik products from Orbitlink Solutions.
Frequently Asked Questions
Does MikroTik RB4011 support VLANs?
Yes. RouterOS provides advanced VLAN functionality, including bridge VLAN filtering, tagged ports, untagged ports and VLAN routing.
What is a VLAN trunk on MikroTik?
A trunk is a connection that carries multiple tagged VLANs between VLAN-aware devices such as a router, managed switch or access point.
What is PVID in MikroTik VLAN configuration?
PVID determines which VLAN untagged incoming traffic belongs to on a bridge port.
Can RB4011 route between VLANs?
Yes. Once VLAN interfaces and IP addresses are configured, the RB4011 can route between VLANs.
Are VLANs automatically isolated?
Not completely. The VLANs create separate Layer 2 networks, but firewall rules should control routed communication between them.
Can I use VLANs for CCTV?
Yes. A dedicated CCTV VLAN is an excellent way to separate cameras and NVR systems from normal office devices.
Can RB4011 handle guest Wi-Fi VLANs?
Yes. Guest SSIDs can be assigned to dedicated VLANs and restricted using firewall rules.
Can I carry VLANs over the SFP+ port?
Yes. The 10G SFP+ interface can be used as a tagged trunk to a compatible managed switch.
Can ISPs use VLANs on RB4011?
Yes. VLANs are commonly used to separate management, PPPoE, subscriber and backbone traffic.
Where can I buy MikroTik RB4011 in Kenya?
You can view the MikroTik RB4011iGS+RM on MikroTik Kenya.
Final Thoughts on MikroTik RB4011 VLAN Configuration
The MikroTik RB4011iGS+RM is an excellent router for VLAN-based professional networks.
A properly designed VLAN configuration can separate:
staff
guests
CCTV
servers
management
ISP subscribers
while allowing the RB4011 to control communication through firewall policies.
For best results:
Plan VLAN IDs and subnets.
Back up the router.
Configure the bridge.
Set PVIDs.
Define tagged and untagged VLAN membership.
Create VLAN interfaces.
Configure IP addresses and DHCP.
Enable VLAN filtering.
Apply firewall rules.
Test every network carefully.
When configured properly, the RB4011 can provide a secure and scalable foundation for business, CCTV and ISP networks.
Before purchasing, check the current MikroTik RB4011iGS+RM price in Kenya.